Posts labeled Breads

Pandoro, which literally means "golden bread", is a traditional Italian Christmas sweet bread, originally from Verona in northern Italy. It is similar to Panettone, another sweet bread eaten at Christmas time, but much less rich and usually unfilled. It is incredibly fluffy and soft and smells deliciously of honey, vanilla and citrus zest - irresistible, if you ask me! 

In Italy, no one in their right mind would make this bread at home, because it's readily available in supermarkets and bakeries for a good price. Here in Auckland on the other hand, one could spend a fortune on these overseas delicacies. So I decided to make it myself. 

I've tried to make Panettone in the past, twice, and failed, twice. Someone told me that Pandoro is much easier to make and I have to agree. For this recipe, I merged two recipes from Bake Street and Tavolartegusto together and adjusted them to my liking. The result is a perfectly golden bread with the typical soft and chewy interior. 

The process is a bit lengthy - it takes two to three days to make this bread. Don't try to rush it, the slow rise builds up the flavour gives the dough its characteristic structure. Make sure that you have the right type of flour, which is Manitoba flour, or at least very strong bread flour. I would prefer to have made this bread with fresh yeast, but couldn't get any on short notice. However, I found that active dry yeast worked well enough.  

Also, I didn't have the typical star shaped Pandoro baking mould, which are available on Amazon or AliExpress. Luckily, my crown bundt tin worked a treat. The important thing is that you chose a baking mould that is tall and leaves enough room for the dough to rise. You don't want anything narrow as you want as much fluffy interior as possible.

Lastly, I don't recommend to attempt this without a sturdy stand mixer. In order to build up the gluten in this enriched dough, it requires a lot of kneading - 15-20 minutes after all the ingredients are added. I don't know how long it would take to knead this dough by hand.

The process has three "stages" of dough: 

  1. - the lievito, a wet pre-dough. 
  2. - the first dough in which you add flour, butter and egg to the lievito
  3. - the second dough in which you add more flour, egg and the spice mix

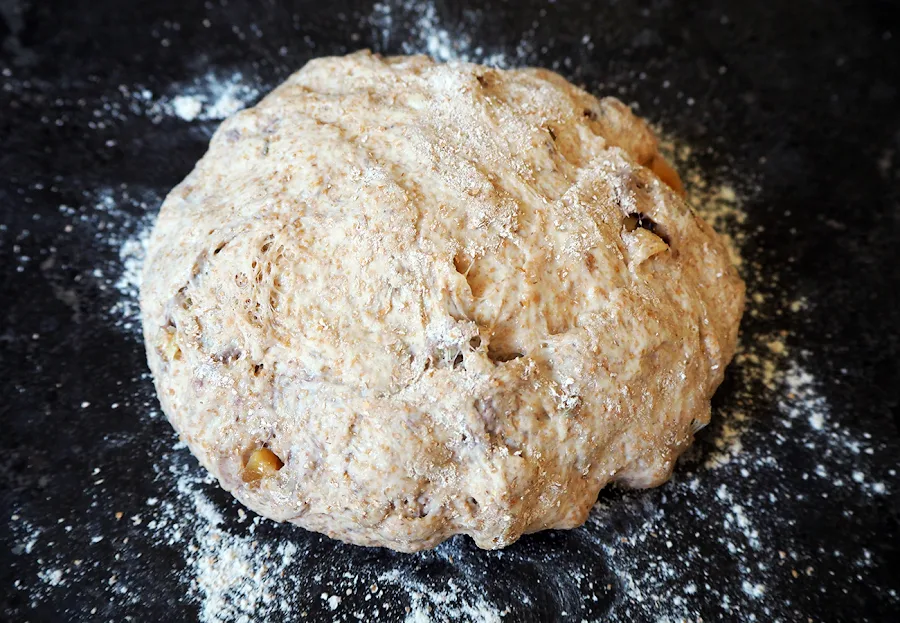
After that butter is folded in, very much like when making puff pastry, and a series of folds are performed. I've added a few pictures of the dough at various stages before and after rising to give you an indication on what to expect. Happy baking!

Pandoro - Italian Sweet Christmas Bread

dough quantity is for a 1 kg Pandoro mould 

Spice mix
2 tbsp runny honey
2 tsp vanilla essence (or seeds of 1 vanilla pod)
zest of 2 lemons or oranges or a mix (finely grated)

For the lievito
5 g active dry yeast
60 g water at room temperature
15g sugar
50 g Manitoba flour
1 large egg yolk (ca 20g)

For the 1st dough 
200 g Manitoba flour
1g active dry yeast
25 g sugar
30 g unsalted butter at room temperature
10 g water
1 large egg

For the 2nd dough 
200 g Manitoba flour
100 g sugar
2 large eggs
5 g salt

To fold in
140g soft butter at room temperature


Prepare the spice mix: Mix the ingredients for the spice mix in a small bowl the day before baking and let stand at room temperature. 

Make the lievito: In the bowl of a stand mixer, combine water, sugar and yeast and let stand for a few minutes until the yeast has bloomed. Add the flour and egg yolk and mix until well combined. This will be a very wet mixture (see picture on the left below). Cover with cling film and let rise at room temperature until doubled in size. For me, at 26C, it took 1 hour, but depending on how warm it is in your house, it could be 1-2 hours. It's ready when you see lots of little bubbles appear on the surface.

Make the first dough: To the lievito in the stand mixer bowl, add sugar, yeast and egg and mix on low speed until you've got a fairly even dough. Add flour little by little. After the flour is well incorporated, add the butter in small pieces, waiting for each piece to be incorporated. Knead on medium speed for a few more minutes until the dough is smooth (see picture on the right below). Cover the bowl again with cling film and let rise until doubled in size, about 2-3 hours, at 25 C, but watch the dough. Mine took less time because it was warmer in my house.


Make the second dough: Again, in the bowl of the stand mixer with the first dough, add flour, sugar and spice mix to the dough and start mixing at medium speed. Add the eggs, one after the other, waiting for them to be incorporated before adding the next. Once they are well incorporated into the dough, add the salt. Keep kneading the dough at medium speed until the gluten is well developed, about 15-20 minutes. The dough should be slightly sticky, but leave the bowl clean.
You want to avoid the dough getting too warm. If necessary, cover the bowl with cling film and put the dough in the fridge for 10 minutes before continuing to knead it to keep it at room temperature. 
With oiled hands shape the dough into a ball and put it into a large, slightly oiled bowl. Cover with cling film and let rise until almost doubled in size, about 2 hours at 25C. Again, watch the dough! For me it took only 1.5 hours.

Once risen, knock back the dough, give it a few kneads by hand and shape into a ball again. Put it back in the bowl, cover with cling film and two tea towels and put it in the fridge to rise for 12-24 hours. (See pics below after having knocked back the second dough and once out of the fridge after 16 hours)


Fold in the butter: Take the dough out of the fridge and let it come up to room temperature, about 1 hour. Lightly flour a surface and your rolling pin and roll out the dough into a 30 x 30 cm square. Distribute butter in the middle of the dough and smooth it with a blunt knife or cake spatula.  Leave about 5 cm on each side of the square unbuttered. 
Now fold the corners into the middle so that the butter is covered and it looks like an envelope. Make sure that you press down the edges to seal in the butter and that the butter doesn't leak out. Now carefully roll it out into a larger square, about 40 x 40 cm again. Fold in half, cover in cling film and put in the fridge for 45 minutes to rest. Repeat this process another 3 times, 4 in total. Always start with rolling the dough out in a square, then an envelope fold and rolling it out again, then fold in half and back in the fridge.

After the round of folds, tuck in the edges and shape the dough into a tight ball and put it in the cake mould. I had to make a hole in the middle, which you would normally not do if you had a proper Pandoro mould. Let rise at room temperature until it reaches the top of the cake tin, maybe a bit higher. This should take anywhere between 8 - 12 hours. If your dough is rising too fast, put it in the fridge after the first few hours and let it rise in the fridge. 


Bake: About an hour before the cake is proofed, preheat the oven to 170C. Butter your cake mould really, really well. If the dough was rising in the fridge, take it out of the fridge 30 to 60 minutes prior to baking to give it another boost in rising. Bake for 15 minutes, then lower the temperature to 160C and bake for another 30-40 minutes. Cover with aluminium foil half way through to prevent it from browning too much. It rises still significantly while baking, so I recommend baking it on the lowest shelf. The bread is done when the interior temperature reaches 90C. 

Let cool for 5 minutes in the tin, then invert and let cool completely. It dries out easily, so I suggest to stick it in a zip lock bag or large Tupperware dish as soon as it is cool. Dust with icing sugar before serving. Enjoy!


Pandoro - Italian Sweet Christmas Bread

Pandoro, which literally means "golden bread", is a traditional Italian Christmas sweet bread, originally from Verona in northern ...

This recipe is based on the beetroot and feta bread recipe in the book "The Sourdough School" by Vanessa Kimbell. Since we were in lockdown (and also because my lovely husband doesn't like feta cheese too much), I had to make do with the ingredients at hand. So basically, this was a "fridge surprise" bread because I had a packet of cooked beetroot in the fridge which needed using up.

During the last lockdown here in New Zealand, three of my co-workers became avid sourdough baking aficionados. Ever since, our Slack channels are filled with photos of all the various baking experiments we undertake. Someone shared a Tiktok video of a how to make a pumpkin shaped bread. I had always wanted to try this technique so I did for this recipe. Still needs some practice, but I think it's not bad for the first try.


For this specific bread I used the retard method, meaning I proofed the dough overnight in the fridge. I'm not super strict with timing. Usually I bake it when I finish my breakfast and coffee, but I guess you could easily leave it to proof for 24h. Apparently the longer you leave it, the more intense the pinkish read colour from the beetroot.

You can either use cooked beetroot, like I did, or roast the beetroot like suggested in the "The Sourdough School" book. Puree it and add enough water to give it the consistency of applesauce. 

I added 1 tsp of cracked black pepper which gave a pretty mild flavour. If you want more kick, double the amount.


Beetroot, black pepper and honey sourdough with rye

makes 1 small loaf

300g beetroot puree (consistency of apple sauce)
40g warm water
90g 100% hydration levain, prepared the night before
320g bread or high grade flour 
80g whole rye flour
8g salt
25g honey
1 tsp cracked black pepper


I followed Vanessa Kimbell's master method for this recipe.

Autolyse: Mix flours in a large bowl. Add beetroot puree and water and mix well. Leave to autolyse for 30 minutes. 

Final dough mix: Add the levain and work it in well. Cover and leave in for 30 minutes. Add the salt. Again, work the dough well to distribute the salt. Cover and leave in a warm spot or use a dough proofer for another 30 minutes.

Bulk fermentation and bench time: After the 30 minutes perform the first set of stretch and folds. Fold in honey and pepper during this first fold. I wanted the honey to be laced through the dough rather than fully incorporated. 
Perform two more sets of folds spaced out by 30 minutes. I left the loaf to bulk ferment for a total 5 h 15 minutes before preshaping it. Give it 20 minutes of bench time, rest the dough uncovered on the bench to give the gluten the possibility to relax. 

Shape and floor time: Shape into a tight boule (or whichever shape you like, check out this article on how to make it a pumpkin shape. ) and put it in the banneton or proofing basket. Leave to rest on the kitchen counter for another 30-45 minutes, depending on how warm it is. This floor time gives the dough the possibility to ferment some more in a warmer temperature.

Overnight fridge proof and baking: Cover the basket with a plastic bag and stick it in the fridge overnight to proof. After 12-24h the bread is ready to be baked. Turn the dough out onto a sheet of baking paper. Score the dough with a lame or knife.

I use a cast iron dutch oven for bread baking. Preheat the oven and dutch oven to 250°C 30 min to 1 hour before baking
Take the dutch oven out of the oven, open the lid and carefully ease the dough straight into the dutch oven. Close the lid and put the pot back in the oven. After 20 minutes, remove the lid and bake for another 17 minutes until the bread has a lovely strong crust.


Beetroot, black pepper and honey sourdough with rye

This recipe is based on the beetroot and feta bread recipe in the book "The Sourdough School" by Vanessa Kimbell. Since we were in...

Banana Bread is a fantastic healthy treat that I make on a regular basis. It's the perfect snack with an afternoon coffee as well a good breakfast option when I have only little time in the morning.


Usually, I would make Banana Bread to use discard starter that I collect in a jar in the fridge. I have adapted the recipe for sourdough spelt banana bread from foodbod to create this banana bread recipe. The addition of apple makes it moist and even more delicious.

I have made various additions to this recipe over the last few months, for example added a tablespoon of Tahini or 1/2 cup of roughly chopped walnuts so feel free to experiment.

This recipe can be made with or without sourdough starter. Just replace 50g of flour and 50g of water with 100g of discard or active sourdough starter at 100% hydration.

Banana Bread with Apple

makes 1 small loaf

1 egg
90 ml milk (or 45 ml water, 45 ml milk)
40 g coconut oil
70 g runny honey
2 medium ripe bananas
1 small apple
20 g whole rye flour
200 g all purpose flour
35 g almond meal
1 tsp baking soda
1/2 tsp baking powder
1 pinch of salt


Preheat the oven to 180ºC top and bottom heat (160ºC fan).

Coarsely grate the apple, mash the bananas with a fork. 
Mix all wet ingredients (milk, egg, honey, coconut oil) and add the apple and banana to it. If using sourdough starter, add it to the wet ingredients mix as well.
Mix dry ingredients (flours, almond meal, salt, spices, baking soda and powder) in a large bowl. 
Combine dry with wet ingredients to form a relatively lose batter. (If experimenting, add in any additions like roughly chopped nuts or swirl through two tablespoons of tahini.)

Line a 20 x 10 cm loaf tin with baking paper. Pour in the batter and use a spatula to even it out.
Bake for 55-60 minutes or until a skewer inserted comes out clean. Leave it in the tin for 10 minutes before taking it out. Leave to cool before cutting it.

Enjoy!  

Pro tip: Cut into slices and freeze for up to 3 months. Directly toast the frozen slices for a quick breakfast.


Banana Bread with Apple

Banana Bread is a fantastic healthy treat that I make on a regular basis. It's the perfect snack with an afternoon coffee as well a good...

These teacakes are easy and fast to make and super delicious with afternoon tea or coffee.

I re-watched old episodes of The Great British Bake Off the other day (don't judge! ;)) and came across something that I didn't know before: teacakes. They are brioche like buns, but less rich and sweet. Spiced and filled with dried fruit - sounded delicious! So here is my take on them.


I really like two very uncommon spices used in Greek baking. Mahlepi, which is ground cherry stones, and Mastic gum, a resin obtained from the mastic tree. These spices are used in sweet bread like Tsoureki which is traditionally baked for Easter in Greece. You can find them in greek shops.

Teacakes and these spices to me seemed like the perfect combination. I'd say however, that it's an accomplished taste, so start off with a quarter of a teaspoon and taste the dough so that you can find out how much of the spice mix is enough for you.

Enjoy them fresh out of the oven or toasted with your favourite toppings.

Recipe adapted from this recipe on BBC goodfood.

Teacakes with greek flavours

makes 4 small teacakes

50 ml milk
50 ml luke warm water
175 g high grad flour (strong bread flour)
3 g dry yeast
1 tbsp sugar
1/4 tsp salt
1/4 - 1/2 tsp spice mix (1/4 tsp cinnamon, 1/4 tsp ground mahlepi, 1 small rock mastic gum crushed, seeds of 1 cardamom pod, crushed)
35 g dried fruit (e.g. raisins, chopped apricots)
1 egg for the eggwash


Prepare the spice mix by combining cinnamon, mahlepi and the crushed mastic rock and cardamom. 
Mix water with the yeast and sugar and let stand for about 10 minutes to activate the yeast.
In the meantime mix flour, salt and spice mix in the bowl of a stand mixer and combine well.
In a small saucepan, combine milk and butter and slowly warm up until the butter has melted. Let the milk and butter mixture cool a little bit before combining it with the yeast water.

Make a well in the flour mix and pour in the liquid ingredients. Stir with a wooden spoon until a dough starts to form. Knead the dough on medium speed (setting 6 on my KitchenAid) until the dough is smooth and passes the window pane test, about 5 -7 minutes.

Place the dough in a lightly oiled bowl, cover with a damp towl and leave in a warm place to rise until doubled in size, about 1 - 1.5 hours.
Once it's risen, divide the dough in 4 equal pieces. On a lightly floured surface, flatten each piece and fill with a quarter of the dried fruit. Roll it up and knead so that the fruit is distributed equally. Shape into a semi-tight ball by cupping your hand over the dough and moving it in a circular motion with the fingers of that hand slightly tucked in and slight pressure.
Leave the shaped buns in a warm place to rise until doubled in size, about 45 minutes - 1 hour. 

Preheat the oven to 180°C fan (200°C top/bottom heat). 

When the buns have risen and the dough springs back slightly but leaves a dent when you poke it with your finger, they are ready to bake. Whisk the egg to make an eggwash and brush each bun with the eggwash. This gives them their characteristic shine. Bake in the top third of your oven for about 16-18 minutes until they have a deep golden brown colour.

I enjoy them warm with (peanut) butter and jam or ricotta, honey and fresh fruit. 


Depending on you preference, you can add more spices or a different spice mix. Next time, I plan on flavouring them with Earl Grey tea leaves. 


Teacakes with greek flavours

These teacakes are easy and fast to make and super delicious with afternoon tea or coffee. I re-watched old episodes of The Great British ...


Baking sourdough bread is great, but it takes a lot of patience. With this schedule, I can bake lovely sourdough bread during the week.

I love to spend my Saturday or Sunday experimenting with different techniques and recipes. However, during the week I missed my homemade bread. I've become a bit of a 'bread snob' since starting to bake my own sourdough bread so I never buy bread anymore. Nothing else to do but to come up with a bread baking schedule that works with a 9 to 5 job.

Since coming across this great video on 'How to make a basic open crumb sourdough bread' by @fullproofbaking I am in love with high hydration doughs. I would really like to be able to achieve such an open crumb. Unfortunately during the week I don't have the time. So I adapted the timings and schedule a little bit to work for my restricted timeframe and this is what I would like to share with you today. The result is good enough for me and always super tasty.


A few things up front: I have a home proofing box (by Brød & Taylor, great addition to my kitchen) to be able to have consistent warm temperature environment for proofing. Otherwise I wouldn't be able to make bread with this schedule in the colder months, when the house is quite cold.

I found it works really well for smaller loaves e.g. 300-400g of flour. I made a 600g flour loaf the other day and I found that it wasn't fully proofed in the morning. It still turned out ok (see picture), but not perfect. Also, I discovered that shower caps (!) are the best for covering the bowl with the dough. Who would have thought?!

The bread in the picture is a 25% whole wheat loaf, 85% hydration, with soaked chia seeds. The seeds are folded in during lamination.

My weekday sourdough bread baking schedule


Day 1

Early morning: build levain, leave it on the countertop during the day

After work: 
  1. 1. autolyse, wait 45 minutes
  2. 2. add levain and incorporate, wait 30 minutes
  3. 3. add salt and incorporate, wait 30 minutes
  4. 4. fold on the countertop,  wait 30 minutes
  5. 5. lamination, wait 45 minutes
  6. 6. perform 2 or 3 coil folds, spaced out by 30-45 minutes, depending on the time
  7. 7. shape and transfer to proofing basket, wait 15 minutes
  8. 8. proof in fridge for 9 hours or as long as possible


Day 2

  1. 1. Preheat the oven and dutch oven, one hour before baking
  2. 2. Bake straight from the fridge. I usually leave the bread on a wire rack and cover it with a light kitchen towel. It cools during the day and I can have a lovely sandwich for dinner.

Here is the full description

The process is basically a shortened version of the one used by Kristen from @fullproof baking (watch the video here):

Day 1:


Some time between 7 and 8am:

Prepare levain: I usually make a levain as described in Ken Forkish's book 'Flour Water Salt Yeast' and leave it on the counter during the day. Depending on when I have to leave the house and come home, I leave it between 8 and 10 hours.

When coming home from work:  
around 5pm, Autolyse: Mix flour and water until no more dry pockets are left. I leave the flour to autolyse for as much time as I can. Typically somewhere between 30 and 45 minutes. 

30 minutes later, add levain: Pour the levain on top of the dough. With a wet hand, spread the levain evenly over the dough and work it in by pinching and squeezing the dough until it's well incorporated. Leave covered for 30 minutes.

30 minutes later, add salt: Sprinkle the salt evenly on top of the dough. Incorporate it well by pinching the dough. Cover again (with a shower cap ;)) and leave for another 30 minutes.

30 minutes later, fold on the counter: Sprinkle or lightly spray your countertop with water. Pour the dough out of the bowl on the countertop. Pat it into a rectangle. Fold the right third of the rectangle over the middle, repeat with the left third. Then fold the top third of the new longish shape down over the middle, repeat with the lower third. You should end up with a nice parcel. Put the dough back in the bowl and leave for 30 minutes.

30 minutes later, lamination and adding of any fillings:  Sprinkle or lightly spray your countertop with water. Pour the dough out of the bowl on the countertop. Stretch out the dough quite thin into a large rectangle. Always stretch from the center out to the sides. Make sure you don't rip it. It should be nice and stretchy by now. This technique is used to increase the overall dough strength. Perform the same kind of third folds like in the last step. (See this video by Brotokoll, which shows the technique well.) Move the dough to a larger rectangle dish and cover again. Leave for 45 minutes.

45 minutes later, around 8pm to 8:30pm, first coil fold: Uncover your dough. With wet hands reach under the center of the dough and slowly but steadily pull the dough upwards until one side folds itself underneath the dough. Turn the dish by 180° and perform the same fold on the other side. Turn the dish by 90° and perform another coil fold, repeat on the opposite side. Cover and leave again for 30-45 minutes, depending on how late it is. Repeat this step another one or two times

Depending on the time, I perform 2 or 3 folds spaced out by 30 minutes or 45 minutes. I usually turn up the home proofing box temperature to 27°C if I have less time. Again, be pragmatic here. 

Around 10:30pm, shaping: Gently pour the dough out it onto a lightly floured countertop. With floured hands shape the dough into a medium tight ball (see here on how shape the dough). Put the shaped dough into the proofing baket, seam side up. Cover and leave on the countertop for 15 minutes. 

Around 10:45pm, transfer to the fridge.

Day 2


I use a cast iron dutch oven for bread baking. Preheat the oven and dutch oven to 250°C about an hour before baking (around 6:30am).

Around 7:30am, Baking: Take proofing basket out of the fridge and bake straight from the fridge. For a 300g flour loaf I usually bake it at 250°C for 25 minutes with the lid on, then remove the lid and bake for another 10 minutes. I like my bread to have a strong deep brown colour and strong crust.
I usually leave the bread on a wire rack and cover it with a light kitchen towel. It cools during the day and I can have a lovely sandwich for dinner.


My weekday sourdough bread baking schedule

Baking sourdough bread is great, but it takes a lot of patience. With this schedule, I can bake lovely sourdough bread during the week. I...


I really like the flavour combination of nuts, dried fig and fennel seeds. The last loaf I made was 100% whole spelt flour and it was accordingly dense-ish. This time, I added some bread flour and used the technique described in Ken Forkish's book 'Flour Water Salt Yeast' to create a lighter crumb. The bread turned out fantastically. It didn't even last 24h!


I didn't have any walnuts at home, so I replaced them with hazelnuts. To give the bread even more flavour, I toasted the hazelnuts as well as the fennel seeds. Toasting the nuts makes it easy to get rid of the skin as well which gives them a somewhat sweeter flavour in the end. Just pour the toasted nuts on a kitchen towel and gently rub them until almost all of the skin has come off. Let them cool before folding them into the dough during the first fold.

As for the dried figs, I cut them up in reasonably big junks and let them soak in hot water for 15 minutes before adding them to the dough, together with the nuts and seeds. Doing this ensures that they don't pull out any water from the dough to rehydrate.


I followed the schedule suggested by Ken Forkish in his book: Mix levain at 8am, start autolyse at 3:30pm, mix final dough around 4pm and bake the next morning at 8am straight from the fridge. As the lucky owner of a home proofing box, I can keep the dough at a constant temperature. If you don't own one, you might have to adjust times e.g. longer times in colder environments, shorter in warmer temperatures.

In the past I had problems with the loaf not holding it's shape when I moved it from the proofing basket onto a surface and then to the dutch oven for baking. I have since started to pour the shaped loaf directly from the proofing basket into the dutch oven. This technique works well for me, but feel free to transfer it to a floured countertop first, score it the way you want and move it from the countertop to the dutch oven.

Whole spelt fig, hazelnut and fennel seed sourdough loaf

makes one small loaf

for the levain
10g active sourdough starter, 100% hydration
10g whole grain flour (I used wholewheat)
45g bread flour
45g warm water, 29-32°C 

for the final dough
108g of the levain
200g whole spelt flour
40g strong white flour (sometimes called bread flour or high grade flour)
198g warm water, ca. 32-35°C
7g sea salt
1g active dry yeast (a generous dash)

filling
7g fennel seeds
30g hazelnuts
50g dried figs


Day 1


Prepare levain (around 8am): Mix flour, starter and water in a large jar or bowl until no dry spots remain. Cover and leave to mature at room temperature. Depending on the temperature in your house, this will take around 6-8 hours. To test if your levain is ready, drop a pea sized piece in a glass of water. It's ready if the piece floats.

Prepare the filling: While the levain is maturing, prepare the ingredients for the filling. Roughly chop the dried figs and soak in boiling water for about 15 minutes. Then drain the liquid and set aside to cool. Lightly toast the hazelnuts in a pan over low heat until the brown skin starts falling off.  Pour onto a kitchen towel and gently rub the nuts to remove any leftover skin. Leave to cool before chopping them up, just a little bit. You want chunky pieces of hazelnut in your bread. Clean the pan and toast the fennel seeds for a few minutes until fragrant. Pour into a small bowl and let cool.  

Autolyse (around 3:30pm for me): When the levain is ready, mix the flour and water for the final dough by hand or with a spatula until no dry spots remain. Cover and let sit for 20 to 30 minutes.

Mix the final dough: Sprinkle the salt and dry yeast evenly on top of the dough. Incorporate by pinching the dough. Transfer 108g of the levain to the dough bowl. With a wet hand distribute the levain evenly over the top of the dough. Drizzle the honey evenly over the levain and incorporate levain and honey again by pinching and folding the dough. When everything has come together cover the bowl again and leave at room temperature.

Bulk fermentation and folds: During bulk fermentation, I folded the dough three times. I performed the first fold after 10 minutes and incorporated the filling with the first fold. Sprinkle about a third of the filling ingredients over the dough. With a wet hand, reach under the dough and pull it out to the point of resistance and fold it over itself. Turn the bowl by 90°, sprinkle another third of the filling on top and perform another fold. Turn then bowl again and repeat the fold twice more. The filling should ideally not be sticking out too much. Cover and let the dough rest for 30 minutes.
Perform another set of four folds after 30 minutes. Cover and let the dough rest for 30 minutes. Repeat folding one more time after the rest. (check out this explanatory video about folding here
After the last fold, cover the bowl and let the dough rest at room temperature until it has more than doubled in size, about 5 hours after mixing the final dough. 

Shaping: When the dough has risen enough, gently pour it out it onto a lightly floured countertop. Because of the high whole grain percentage, it is a rather sticky dough. Generously flour a proofing basket. With floured hands shape the dough into a medium tight ball (see here on how shape the dough). Put the shaped dough into the proofing baket, seam side up (you have to turn it upside down).  Put the basket in an unperforated plastic bag and put it in the fridge overnight (about 12 hours). 

Day 2


I use a cast iron dutch oven for bread baking. Preheat the oven and dutch oven to 250°C about an hour before baking (around 7am).

Baking (around 8am): Take proofing basket out of the fridge. Take the dutch oven out of the oven, open the lid and carefully ease the dough straight into the dutch oven. If you have a lame or sharp knife, score the dough. Be really careful not to burn yourself on the super hot dutch oven! 
Close the lid and put the pot back in the oven. After 27 minutes, remove the lid and bake for another 10 minutes until the top is a deep brown and has a lovely strong crust. 

Remove the dutch oven from the oven and take out the bread. Leave to cool completely on a wire rack before cutting. Enjoy with your favourite topping.


Whole spelt fig, hazelnut and fennel seed sourdough loaf, take 2

I really like the flavour combination of nuts, dried fig and fennel seeds. The last loaf I made was 100% whole spelt flour and it was acco...


The best whole spelt pizza dough - a bold claim, I know. My (Italian) husband and I make pizza every Sunday night, so I've tried a bunch of recipes. And this one is the best, seriously. Granted, it takes a bit of time, but I promise the taste is worth it.


Have you ever watched the Netflix series 'Chef's table'? It's a series that portraits another exceptional chef all over the world in every episode. One episode is about Nancy Silverton and her pizza dough recipe which is allegedly way too complicated and elaborate for a pizza dough. Being obsessed with bread and pizza myself I obviously had to try it out. And yes, the pizza dough tastes pretty amazing.

However, being me, I wanted to make it a tiny bit healthier and experimented with various degrees and varieties of wholemeal flour. Last Sunday I finally went 80% spelt whole meal and the result was spectacular. In fact, so good that I want to share it with you. It takes about 5 hours in total until baking, but most of it is waiting until the dough has risen sufficiently.  Keep in mind that if your kitchen is very cold the dough might take longer to rise. The ideal temperature, as stated in the original recipe, is between 20-22°C.


Because spelt flour contains a different, weaker kind of gluten than wheat flour, I use some bread flour in the recipe which is very high in gluten to give the dough some stability. Luckily, I am the proud owner of a Kitchenaid so I don't have to knead by hand. It's perfectly fine if you knead the dough by hand. It will take some elbow grease and perhaps longer than indicated in the recipe. You can use the windowpane test to make sure that the gluten has developed enough.

At the start when kneading the dough it will almost resemble batter. The high percentage  of wholemeal flour makes this dough quite sticky. That's how it is supposed to be. Resist the urge to add more flour. After kneading it, it should be only slightly sticky. If it is still unmanageable, add up to 1 tbsp of bread flour. Depending on the flour you use, the quantity will vary.

The best whole spelt pizza dough

makes 2 medium pizzas - takes about 5 hours

215 ml warm water (something like 30°C)
1/3 tsp active dry yeast*
195g whole spelt flour
50g white bread flour (high grade flour)
1/3 tbsp whole rye flour
1/2 tsp wheat bran
1/3 tsp runny honey
1/3 tsp salt
olive oil
semolina (or polenta) to keep the pizza from sticking to the pizza stone


1. Mix yeast and water: Mix 150 ml of the water with the yeast and let stand for a few minutes until the mixture is bubbly.

2. Add some of the flours and wheat bran: In a large bowl, mix 50g bread flour with 75g of whole spelt flour with the rye flour and wheat bran. Add the yeast mixture and stir until well combined. It will be quite a wet mixture. Cover the bowl and let sit at room temperature (ideally 20-22°C) for about 1.5 hours. (You can use cling film, but I prefer to use a plate.)

3. Add remaining flour, water and honey and knead: Add the remaining 120g whole spelt flour, 65 ml warm water and honey to the dough. Knead in a standing mixer fitted with a dough hook on low speed for about 2 minutes.

4. Add salt and knead: After 2 minutes of kneading, with the machine still running, add the salt. Turn up the kneading speed to medium and knead for further 8 minutes. The dough should become smooth and elastic and only slightly sticky. It should begin to pull away from the sides of the bowl at this stage. If it is overly sticky, add up to a tbsp of bread flour and knead for another minute. Grease another large bowl with olive oil and transfer the dough to the greased bowl. Cover the bowl and let the dough rise for about 45 minutes. 

5. Fold the dough: Grease your hands with olive oil so the dough doesn’t stick. Uncover the bowl and carefully pull the sides away from the bowl. Grab the underside of the dough and fold it over itself towards the centre. Turn the bowl 90° and fold the next side. Repeat until all four sides are folded over. Then turn the dough over in the bowl so that the the folded sides are facing down. Cover the bowl once again and let it rise for another 45 minutes.

6. Divide and proof: Carefully pour the dough out of the bowl onto a well floured surface. Divide it in two equal pieces with a sharp knife or metal scraper. Shape the pieces into tight balls by tucking under the edges and rolling it in a circular motion on the countertop or in your hands. Like so. Cover the dough balls with a kitchen towel and let them proof for about an hour. 
If you plan on baking your pizza in the oven, I recommend to start preheating the oven (and the pizza stone if using) for about an hour to 250°C. The pizza stone also works exceptionally well on the BBQ.

Baking time!: Dust your work surface with flour. Take one dough ball and carefully press it down and out with your palm and your fingers until you have reached the desired thickness for your pizza base. Use flour liberally to keep it from sticking on your hands or the work surface. 
If using a baking tray transfer the dough to a baking tray lined with baking paper and sprinkled with semolina. If using a pizza stone - which I highly recommend - sprinkle your pizza peel with flour and semolina and transfer the shaped pizza base onto it
Lightly brush the edges with olive oil and top it with whatever tickles your fancy... no pineapples please! Bake at 250°C for about 8-11 minutes until the cheese has melted and the edges are starting to brown. Buon appetito!

Notes
* Some time soon I will create a sourdough version of this recipe. That's the plan anyway.

The best whole spelt pizza dough

The best whole spelt pizza dough - a bold claim, I know. My (Italian) husband and I make pizza every Sunday night, so I've tried a bunc...


This recipe is for a 100% whole spelt sourdough loaf.

I wrote in another post that a few weeks back I ordered way too much whole spelt flour. Hence I keep my eyes open for whole spelt flour recipes all the time. In fact, I pretty much make everything with spelt flour these days. Pizza crust, for example, or bread rolls.

I found this recipe for whole spelt rolls and the rolls came out fantastic. I've added pumpkin seeds, fennel seeds and ground cumin to my first batch. It inspired me to try the same dough but as a loaf and with a different flavour combination.

Spelt flour has an earthy and nutty flavour which, in my opinion, pairs particularly well with dried fruit and nuts. The addition of fennel seeds just gives this little bit of extra depth to the flavour. In Austria we traditionally spice bread with a mixture of anise, coriander, caraway and fennel seeds.
Blue cheese and thyme-blueberry jam are perfect with a slice of this bread.


When folding in the nuts and figs, make sure they are well distributed but be careful as not to squash the figs too much. You want large-ish bits of fig and nut in the finished bread. As with every bread containing dried fruit it is important to make sure that non of the fruit stick out before baking. Otherwise they will burn and are not very nice to eat. I baked the loaf in a cast iron pan, but a dutch oven works as well. If you want a harder crust, remove the lid a little earlier.


After a friend mentioned to me that he was keeping a baking journal, I recently started to do the same and keep track of kitchen temperature, humidity, rising times and such things for each bake. It's especially useful when working with sourdough as all of these parameters have an influence on the outcome. My notes on how the whole spelt rolls came out greatly helped me to work out rising times and how much spices to add. I can highly recommend this practice.

Whole spelt fig, walnut and fennel seed sourdough loaf

makes one small loaf

Ingredients
for the dough
500g whole spelt flour
388g warm water, ca. 29-33°C
140g active sourdough starter, 75% hydration*
12g sea salt
2 tbsp olive oil
for the filling
15-20g fennel seeds
65-80g walnuts (coarsely chopped)
65-80g dried figs (coarsely chopped)

Directions

Day 1
  1. Autolyse: In the bowl of a stand mixer mit water and flour. Cover the bowl with a plate (or plastic wrap, but I don't want to use plastic) and let rest for 40 minutes.
  2. Knead: Add salt, starter and olive oil and knead on low with the dough hook for about 5 minutes. Cover and let ferment for 30 minutes.
  3. First fold and filling: Add a third of the chopped nuts and fennel seeds. Grab the bottom of the dough and fold it over the top. Turn the bowl by 90°, add another third of the filling and fold the next side. Turn the bowl again by 90°, add the rest of the filling and fold the third side. Turn again and perform the last fold. Cover and let rest for 30 minutes.
  4. Second fold: Perform another set of four folds. Cover and let the dough rest for 30 minutes.
  5. Third fold: Perform the last set of folds. 
  6. Slow rise: Cover the bowl with a plate (or plastic wrap) and put in the fridge or fresh drawer for 12-24 hours until doubled in size.**
Day 2
  1. Preshape: When the dough has roughly doubled in size and has large air bubbles on the top, take it out of the container. Shape into a ball and let rest for 20 minutes.
  2. Shape and proof: Shape the dough into a boule. It is not as easy because of the filling. Make sure none of the fruit stick out as they would burn. Move the dough to a floured banneton, seam side up. Let proof at room temperature for about 2 hours.
  3. Preheat the oven and the cast iron pan, lid on, to 230°C (top and bottom heat) about an hour before baking.
  4. Bake: Take the pan out of the oven, Drop the dough from the banneton into the hot pan. Slash the bread with a lame or very sharp knife. Bake with the lid on for about 25-30 minutes. Remove the lid and turn down the heat to 200°C. Bake for another 10-15 minutes. Let cool in the pan for about 10 minutes before moving the finished loaf to a wire rack to cool completely. 

Notes
* I used 50/50 whole wheat and bread flour starter, but if you want to go wheat free, use a spelt flour starter.
** My fridge has a fresh produce drawer and that's where I usually put the dough for a slow rise during the night. If I want to bake during the day, I take the bowl out in the morning and let it finish rising at warm room temperature which speeds up the rise. 


Whole spelt fig, walnut and fennel seed sourdough loaf

This recipe is for a 100% whole spelt sourdough loaf. I wrote in another post that a few weeks back I ordered way too much whole spelt fl...